How to build an AI Chatbot using Amazon Lex and Lambda, and Integration with ReactJS

A multi-talented individual with a strong interest in technology As an experienced software developer, I enjoy creating innovative solutions to real-world problems. With an eye for detail and a passion for clean code.
I am a talented technical writer in addition to software development. My content always delivers value due to my ability to explain complex technical concepts in simple terms, whether it's documentation, blog posts, or tutorials.
When it comes to cloud computing, I design scalable architectures, optimize cloud-based applications, and understand how to use the cloud's power to drive business results.
Overall, I am a versatile and talented technologist who is constantly pushing the boundaries of what technology can do.
Introduction
Chatbots have emerged as one of the latest trends in modern-day technology, and they're significantly impacting our day-to-day activities. From scheduling appointments and medical advice to booking flights, chatbots are simplifying our lives and making everything more accessible and efficient, as they can provide instant responses and personalised interactions.
Amazon Lex is one of the most popular platforms for creating fast and scalable chatbots. In this article, I’ll walk you through creating a chatbot with Amazon Lex and Lambda and how you can integrate it into your React.js project.
In this article, you’ll learn how to build a COVID Tracker chatbot using
Amazon Lex UI console to build and test the chatbot
AWS Lambda Function enhances the chatbot's capabilities, providing users with more accurate and up-to-date information.
AWS CloudFormation to automate the deployment and management of the applications in simple steps.
At the end of this article, you’ll understand how to build, enhance, and deploy your chatbots with the help of AWS Lex, Lambda Functions, and Cloud Formation and how to include them in your React.js projects.
Prerequisites
An AWS account
Some basic understanding of Node.js is required.
A working computer with any operating system
Any text editor you’re comfortable using
What is AWS Lex
AWS Lex is a cloud-based service provided by Amazon Web Services that enables developers to build conversational interfaces using voice and text. It uses natural language understanding (NLU) technology to understand and interpret user input, allowing developers to create chatbots, voice bots, and virtual assistants that can interact with users in a human-like way.
For example, Capital One, a large financial institution, used AWS Lex to create Eno, a virtual assistant that helps customers manage their accounts through a chat interface. Eno can answer questions about account balances, transactions, and payments and proactively alert customers to potential fraud.
Another example is the healthcare company HealthTap, which used AWS Lex to create a chatbot that helps patients find answers to their health-related questions. The chatbot uses natural language understanding to interpret the user's question, providing relevant information and resources based on the user's needs.
AWS Lex enables developers to build powerful conversational interfaces that improve customer engagement and automate everyday tasks.
How to Build an AWS Lex Chatbot
Log in to your AWS management console via this link to get started.
Search for Amazon Lex in the top navigation bar and select open the Amazon Lex dashboard. We’ll be doing most of our operations on the dashboard, like creating, managing, and testing our chatbot.

We’ll be using the Version 1 console. Click “Return to the V1 console” from the sidebar to switch to the V1 user interface console.

- To create a new chatbot, click the "Create" button. First, we’ll be prompted to select if you want to create our custom bot or use one of the sample bots. We'll continue with the first option since we’re creating a custom chatbot.

- For our custom bot, we must set up a few basic options. The following fields need to be specified:
Bot name: In our example, let's call our bot "CovidChatBot." This field includes the name of our bot. It must be extended between 2 and 50 characters and only allow letters—no spaces.
Language: This is the language that our chatbot will use to communicate. Let's choose “English (US).”
Output voice: The Lex Service provides us with different voice outputs we can use for our chatbot. We’re building a text-based chatbot, so let’s use the "None" option.
Session timeout: This option specifies how long we want Amazon Lex to retain the context; it can be set between zero and 1440 (24 hours). Let's go with 5 minutes.
COPPA: This stands for the Children’s Online Privacy Protection Act. This indicates if our bot is subjected to COPPA. Select no, as our bot does not apply to COPPA.
We'll leave the other fields at their default values.
Defining Intents, Utterances, and Slots
Excellent work! We've successfully created our custom COVID chatbot, but before we move on, let's go over the key fundamental components of the Lex service: Intents, Utterances, and Slots.
Intents
"Intents," as the name suggests, are a fundamental concept used to represent the purpose or goal of a user's input. Intents can be viewed as a verb, detecting a user's intention. For example, if you go to a pizza shop and order a pizza, your primary intention is to order pizza. Your purpose of going to the store is to get pizza. This works the same way for lex-powered chatbots. We must define intents so the bot can easily track or identify our goals during a conversation.
Utterances
Utterances are phrases or sentences we might use to convey a specific meaning or request. For example, when we walk into the pizza store to order a box of pizza, a possible request we could make is, "I want to order a box of pizza." These utterances teach the chatbot how to understand and respond to what we are saying. The more utterance we give, the better the chatbot will understand what we’re trying to say.
Slots and Slot Types
Slots are the information you prompt chatbot users to provide during a conversation with your bot. In the COVID chatbot we're building in this article, for example, we can define slots by country and prompt the user to enter a value for each slot. The bot will prompt the user to provide information for each slot, and once all of the required slots have been filled, the bot will be able to process the order and respond appropriately.
Amazon Lex includes a variety of built-in slot types, including numbers, dates, countries, and many more. We can also define acceptable values by creating custom slot types.
Developing our Covid Chat Bot
We must create our intents and add possible utterances and slots as needed.
Creating Intents
Let's make four intents for our Covid chatbot: the Welcome intent, the About intent, the CovidTracker intent, and the Goodbye intent.
- Navigate to the Lex console to create the four different intents. Click the "Create Intent" button to open a modal window with three options; select the "Create Intent" option. We must give each intent a distinct name to distinguish them when writing our lambda function.
Creating Utterances
Ideally, adding as many utterances as possible is best to make the chatbot efficient.
To create an utterance, on the sidebar, select the intent you want to create possible utterances for. Under the "Sample Utterances," we can go ahead and add as many possible utterances as a user can ask our chatbot.
CovidTracker Utterances
This is the fundamental part of our chatbot, as our chatbot is tasked with providing current COVID information. For this intent, we’ll add possible utterances, and I’ll also show you how to add slots and how they work in action.
To add slots, we need the bot to identify them, so we have to wrap the words in curly braces when defining an utterance.

We've added a slot called "country," because our CovidTracker Intent requires the country's name where a user wants to learn more about the COVID situation.
When we add slots, we must also include the slot type. This could be valuable, but we'll use "Amazon. Country". We also have the option of adding prompts. " Prompts are messages or questions to obtain user input for a specific slot. They can be customized, and multiple prompts for a single slot can be created to provide variety.
Goodbye and About Utterances


As the name implies, the goodbye and about intents will include possible utterances that tell users more about our Chatbot and send personalized goodbye messages to our users. I've added a list of possible utterances, as shown in the screenshots above, but feel free to add as many as you like.
Integrating the chatbot with AWS Lambda
AWS Lambda is a way to write and run code without worrying about setting up and maintaining the underlying server or computing resources. We can focus on writing our code, and Lambda executes it and scales it as needed based on demand. It’s a popular choice for building serverless applications.
Why do we need a Lambda Function attached to our chatbot?
Then you're probably wondering why we need a Lambda function associated with our chatbot. Our COVID Tracker chatbot relies on lambda functions to perform various tasks based on user input or conversation state. This is why we require a lambda function for our project:
Retrieving COVID data: Our Lambda function will retrieve the most recent COVID data from a third-party API based on what our users request for a specific country. It provides our users with real-time information.
Processing user input: Before returning a response to the user, our lambda function will process and validate their input. If a user requests data for a country that does not exist, the lambda function will respond with an appropriate error message.
Provide additional resources: It will provide additional resources based on the user's request. For example, if a user requests more information about COVID-19 symptoms, the Lambda function can return links to relevant articles or resources.
Introducing a Lambda function into our COVID tracker chatbot will improve its capabilities, allowing it to provide more accurate and up-to-date information to our users while providing a more engaging conversational experience.
Writing Lambda functions using Node.js
- To begin, go to the management console and search for and select the Lambda service.

- Click the "Create Function" button to create a new Lambda function. Lambda offers three different options, but the "Author from scratch" option best fits us.

We need to name our lambda function. I recommend choosing a name that is simple and descriptive. Let's call it "chatBotFunction" following the camel naming convention.
Because we're writing our function in Node.js, we'll use the Node.js 18 runtime environment.
Click the "Create function" button to finish creating an environment for our "chatBotFunction" Lambda Function.
The following page is a function editor. This is a sandbox where we can write, test, deploy, and monitor code performance.
Writing Our Lambda Function
Open your preferred code editor to begin writing the lambda function. We're using a text editor because it allows us to install dependencies needed for our lambda function to function correctly.
Launch a new terminal and run the following commands. I'm using "npm" as my package manager. You can use commands specific to your preferred package manager:
// this creates a new package.json file
> npm init -y

// installing dependencies to make requests to the API
> npm install request request-promise --save

// this creates an index.js file ( the name of the file should be the same as below, since it will be referred as default handler in lambda function as "index.handler")
> touch index.js
- Open the newly created index.js file and copy the code below there. I’ll explain what each line of code does.
const Request = require("request-promise");
const numeral = require("numeral");
const dispatcher = async (event) => {
  let response = {
    sessionAttributes: event.sessionAttributes,
    dialogAction: {
      type: "Close",
      fulfillmentState: "",
      message: {
        contentType: "PlainText",
        content: "",
      },
    },
  };
  switch (event.currentIntent.name) {
    case "CovidTracker":
      try {
        let url =
          "https://disease.sh/v3/covid-19/countries/" +
          event.currentIntent.slots.country;
        console.log("endpoint: " + url);
        let result = await Request(url, { json: true });

        console.log(result.todayCases);
        response.dialogAction.fulfillmentState = "Fulfilled";
        response.dialogAction.message.content =
          "Today (" +
          new Date().toISOString().slice(0, 10) +
          ") Cases: " +
          numeral(result.todayCases).format("0.0a") +
          ",\n" +
          "Recovered: " +
          numeral(result.todayRecovered).format("0.0a") +
          ",\n" +
          "Deaths: " +
          numeral(result.todayDeaths).format("0.0a") +
          "\n" +
          "Total Cases (till date): " +
          numeral(result.cases).format("0.0a") +
          ",\n" +
          "Recovered: " +
          numeral(result.recovered).format("0.0a") +
          ",\n" +
          "Deaths: " +
          numeral(result.deaths).format("0.0a");
      } catch {
        response.dialogAction.fulfillmentState = "Failed";
        response.dialogAction.message.content =
          "Sorry, no data found for provided country. Please try again with correct country name!";
      }
      break;
    case "Goodbye":
      response.dialogAction.fulfilmentState = "Failed";
      response.dialogAction.message.content =
        "Goodbye, Stay Updated! Stay Protected!";
      break;
    case "AboutBot":
      response.dialogAction.fulfilmentState = "Failed";
      response.dialogAction.message.content =
        "This bot helps to stay updated on the latest covid-19 informations.";
      break;
    case "Welcome":
      response.dialogAction.fulfillmentState = "Fulfilled";
      response.dialogAction.message.content =
        "Hello, I'm Dexa, How can I help you today?";
      break;
    default:
      response.dialogAction.fulfillmentState = "Failed";
      response.dialogAction.message.content = "No data found for this country";
      break;
  }
  return response;
};
exports.handler = async (event) => {
  return dispatcher(event);
};
This is a Node.js module that exports a function called a handler. This function takes an input event object and returns a response object.
The handler function first imports two Node.js packages: request-promise and numeral. request-promise is a library that allows the code to make HTTP requests to external APIs. numeral is a library that helps with formatting numbers.
The dispatcher function is defined next. This function takes an event object and returns a response object. It creates a default response object with a Close dialog action type and an empty message.
The function then switches on the name property of the currentIntent object in the event input to determine what action to take. The code has cases for the following intents:
CovidTracker: This case retrieves COVID-19 statistics for a country and formats them into a response message. It uses the request-promise library to make a GET request to an external API, retrieves the relevant statistics, and formats them into a response message using the numeral library. The response message is then added to the message property of the default response object.
Goodbye: This case returns a farewell message as the response.
AboutBot: This case returns a message describing the purpose of the bot.
Welcome: This case returns a greeting message as the response.
Default: This case handles any other intent not covered by the other cases. It simply returns a generic message saying no data was found for the requested country.
Finally, the dispatcher function returns the response object.
The handler function calls the dispatcher function with the event input and returns the result. This makes the dispatcher function the primary logic for handling the input and generating the output of the AWS Lambda function using this code.
- AWS Lambda allows us to upload our file, which contains our code, to the playground. Since we have used npm modules for this lambda function, we have to zip the function, and we can do this by running this command in the terminal.
// create zip file
> zip -r handler.zip *
Click the "Upload from button" on the right side of the page, opposite the "Code Source" heading, from the playground, and select the ".zip file" option.
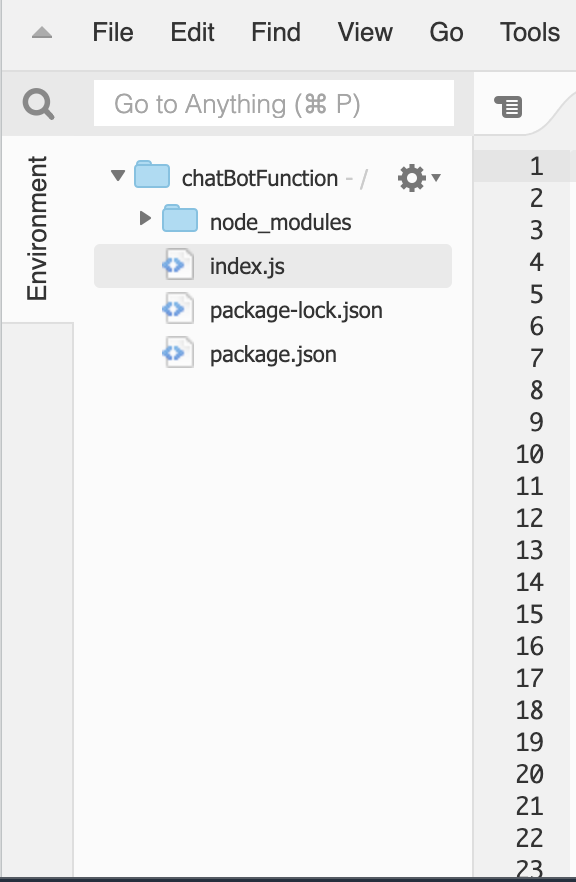
After the file upload is complete, the directory structure should look like this.
We must test the lambda function before deploying it, which requires some basic configuration.
Click the arrow next to the Test button to open a dropdown menu with the "Configure test event" option. A modal window with a few basic configuration options will appear when you do.
As your test event action, choose "Create new event" and give it a descriptive name, such as "CovidTracker" in my case.
Copy and paste the code below into the "Event JSON" field. Change the slots.country value to the name of your country, then click the Save button.
{
  "messageVersion": "1.0",
  "invocationSource": "DialogCodeHook",
  "userId": "John",
  "sessionAttributes": {},
  "bot": {
    "name": "MakeAppointment",
    "alias": "$LATEST",
    "version": "$LATEST"
  },
  "outputDialogMode": "Text",
  "currentIntent": {
    "name": "CovidTracker",
    "slots": {
      "country": "Nigeria"
    },
    "confirmationStatus": "None"
  }
}
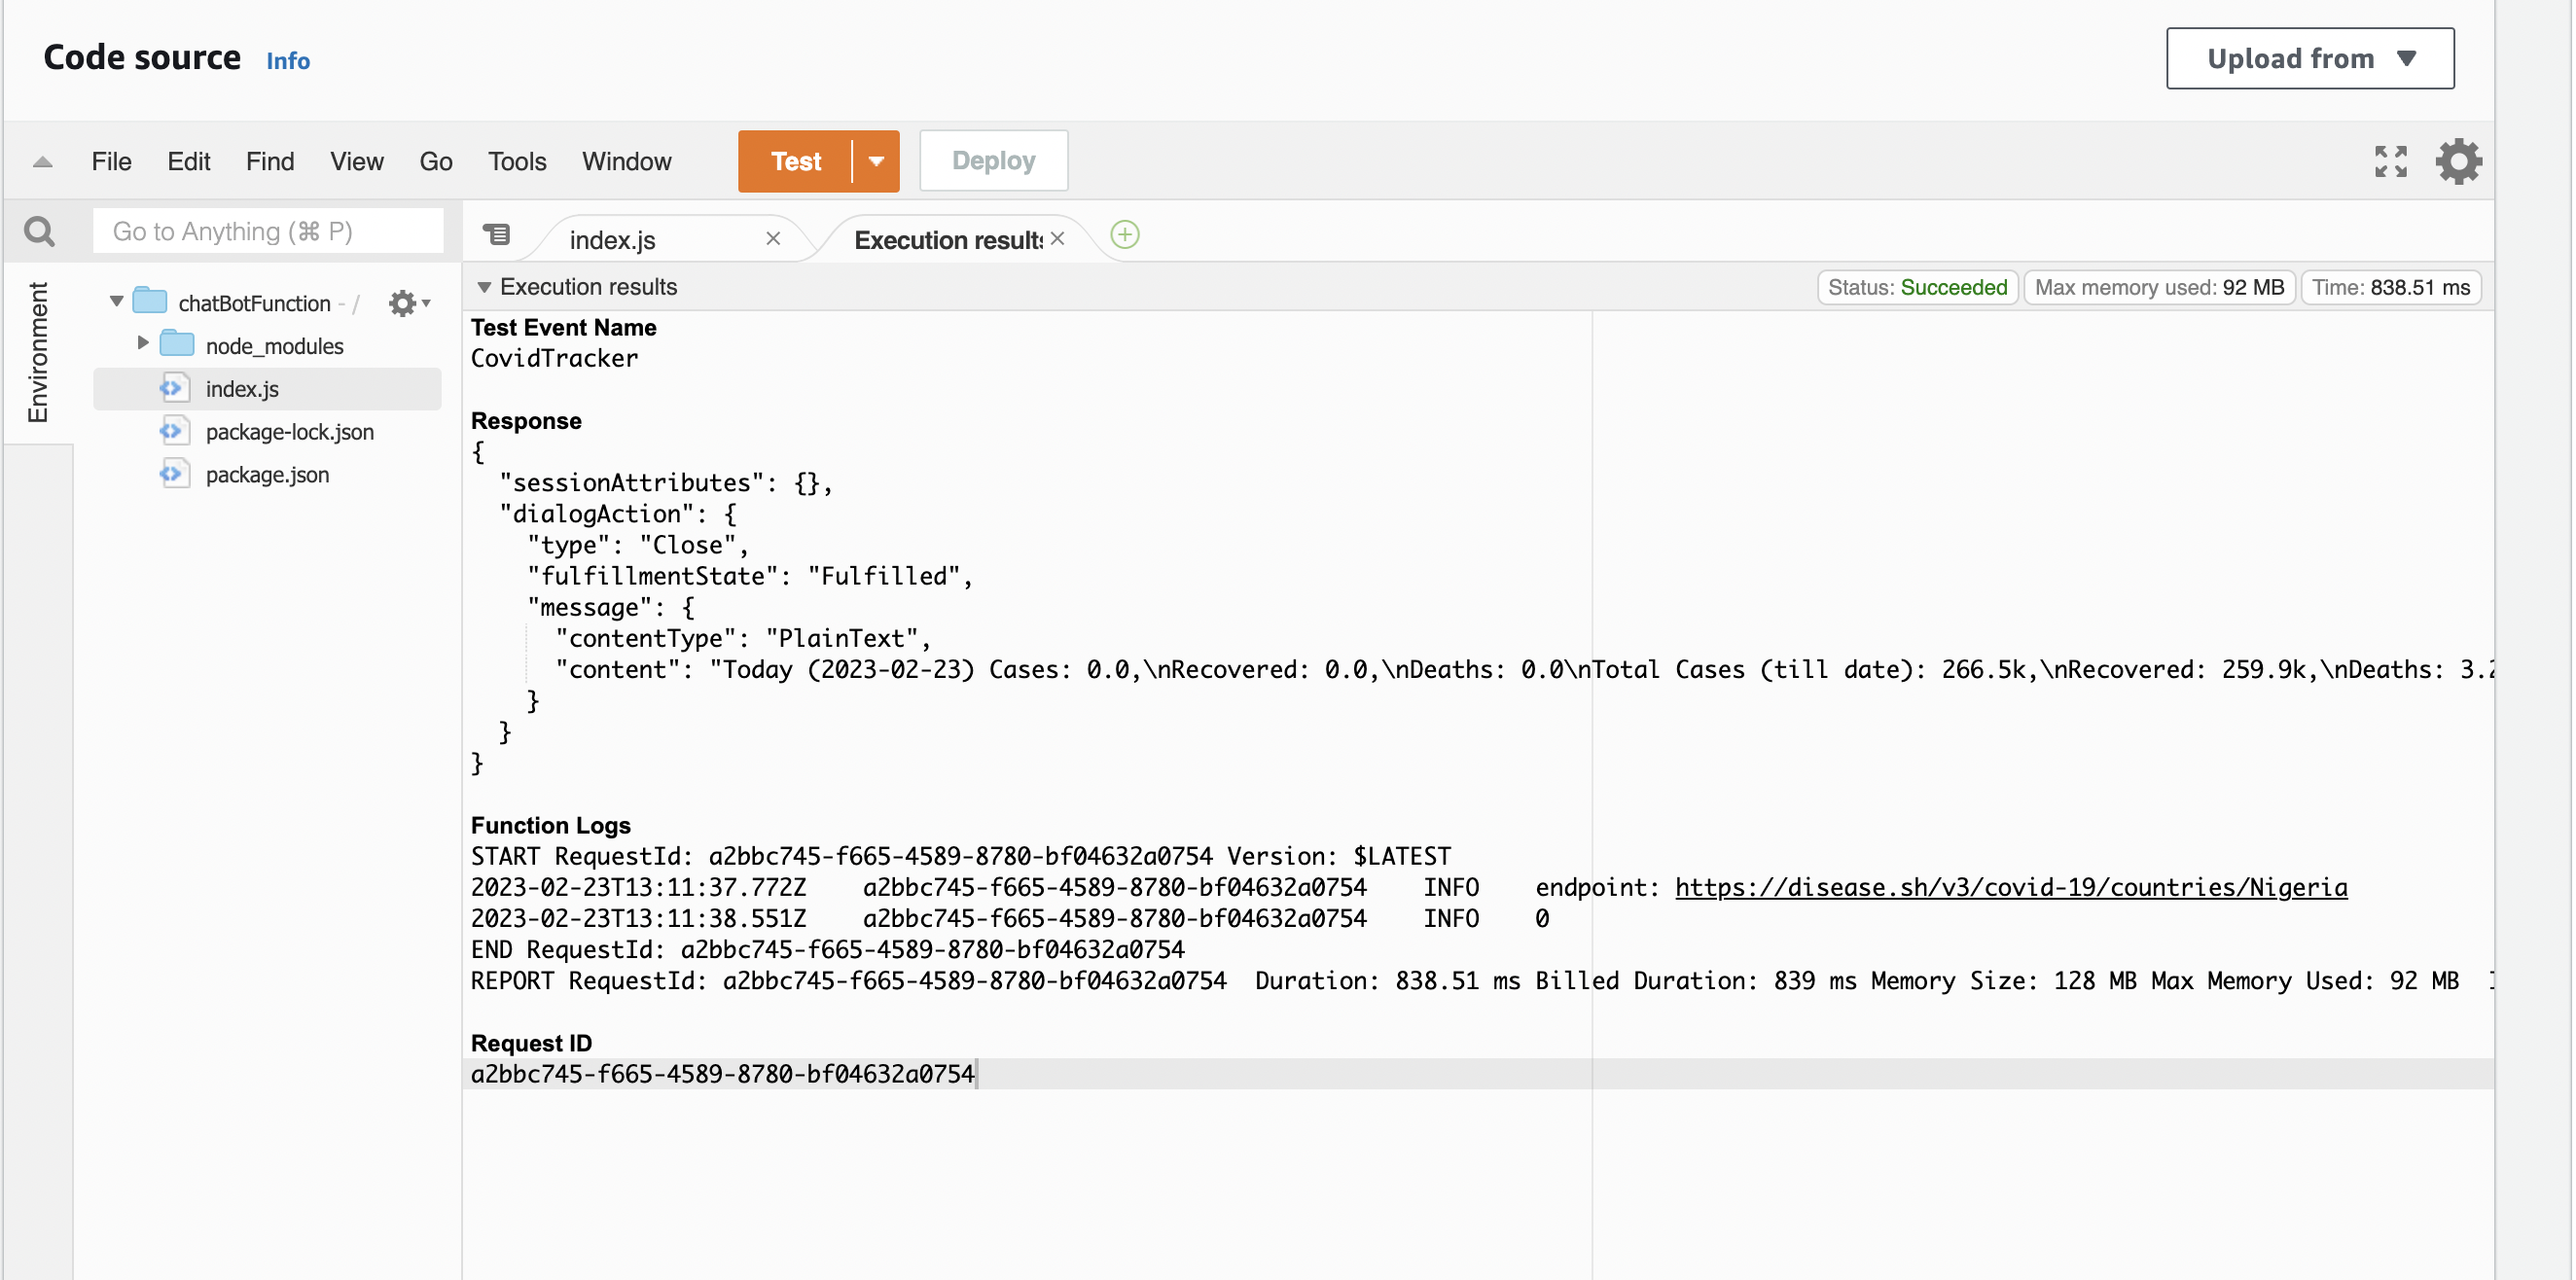
When you press the Test button, you should get the response in the screenshot below.
Attaching our Lambda function to our Lex bot.
Congratulations! Now that we've successfully created our lambda function, we must connect it to our chatbot to improve its capabilities.
- Choose one of the four previous intents. Under "Fulfillment," choose the AWS Lambda Function option and the chatBotFunction, ensuring it's the most recent version. Do this for the remaining three intents.
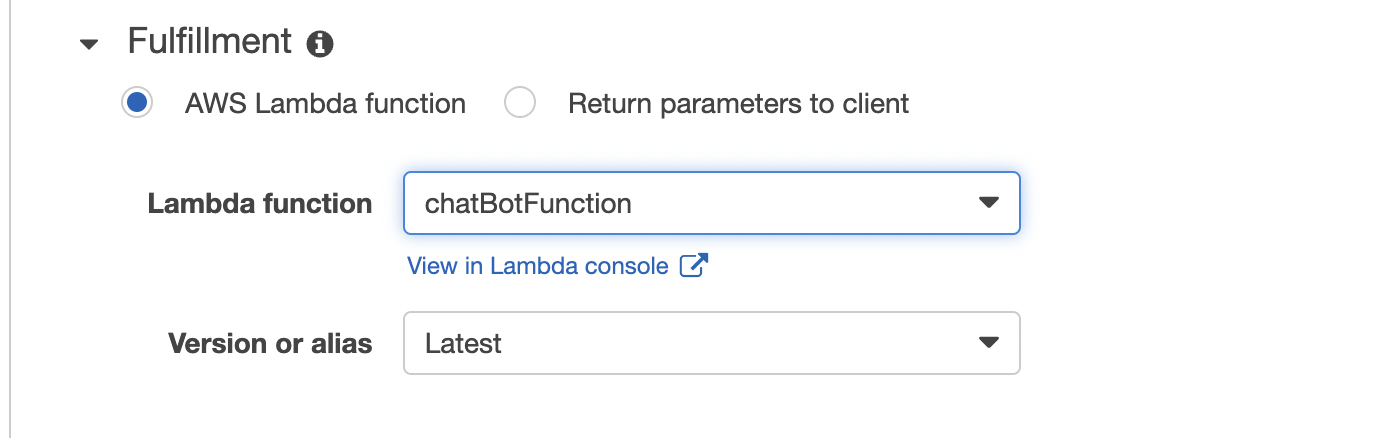
- To save all changes, click the "Save Intent" button. When changing any of your created intents, always click the save button.
Putting our Chatbot to Test
Let's put our bot to the test. Select the "Build" option. This button is located on the right side of the page. This button allows us to build our chatbot and use the test playground.
This only takes a few seconds, and we can put it to the test.
- You can use all the utterances specified in each intent to converse and test the bot's efficiency.
Good job! Our bot is now ready for deployment.
Deploying the Bot Using AWS CloudFormation
Our bot is complete, but we must consider hosting and deploying the user interface. AWS already offers a simple method via one of its services, AWS CloudFormation.
AWS CloudFormation is an AWS tool that allows us to create and manage cloud resources. It enables us to automate application deployment and management in simple steps. More information can be found here.
- To begin, go to the management console, search for and select the Cloud Formation Service.
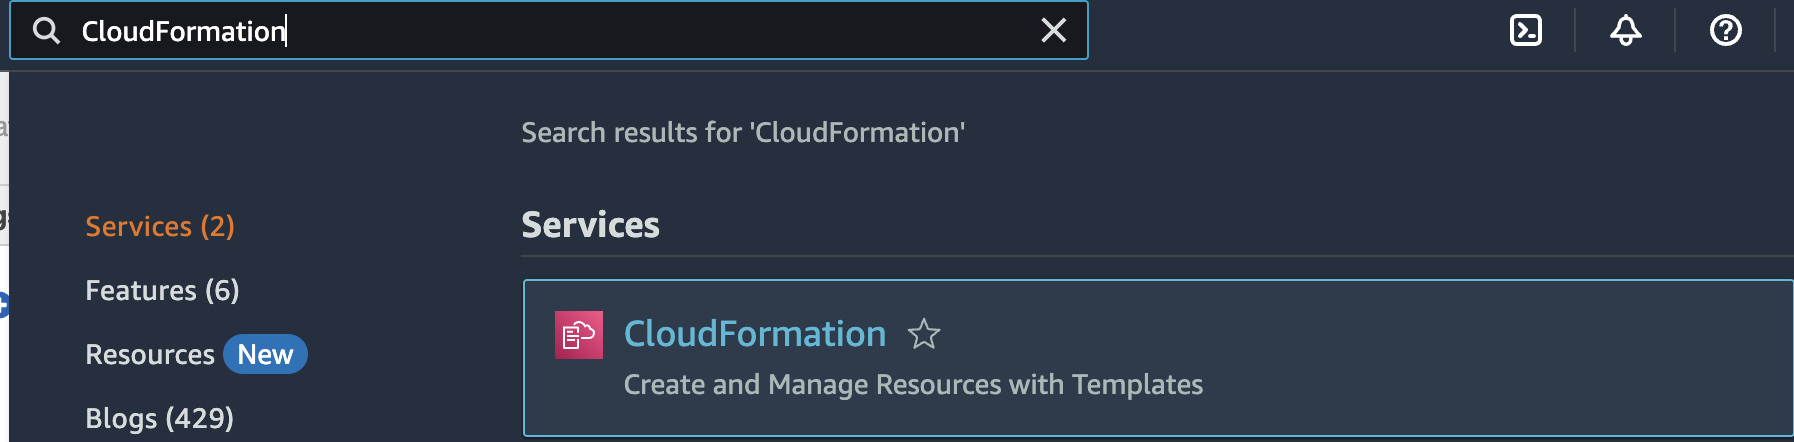
Ensure that your selected region is the same as where you created your bot.
- You should see a page with various configuration options, but the ones we're most concerned about are:
Stack name: Provide a descriptive stack name that may include alphabets, numbers, or dashes.
CodeBuildName: This is the name of the CodeBuild project that will be created. It is used to upload the web application to S3. You could call it the same name as your stack name.
BotName: This applies to us under the Lex V1 Configuration parameters because we created our bot using the V1 console. You must use the same name you used when creating your bot in the Lex console. "CovidChatBot". Ignore the form field Lex V2 Bot Configuration Parameters.
WebAppParentOrigin: In the Web Application Parameters form section, we must enter the WebAppParentOrigin, the URL to which we want our bot's user interface to be integrated. Enter the URL where your React.js project is hosted.
WebAppPath: Under "Web Application Parameter," you must specify a path to the page (or pages) under WebAppParentOrigin that will host the chatbot UI. A comma-separated list of paths can be specified.
WebAppConfBotInitialText: This is the first bot-message displayed to users in the chatbot UI.
WebAppConfToolbarTitle: The title that appears in the chatbot UI toolbar.
Once you've finished filling out the form fields, confirm the two acknowledgments at the bottom of the form and click the "Create Stack" button.
Once your stack has been created and deployed, you should see the following entries in the screenshot below.
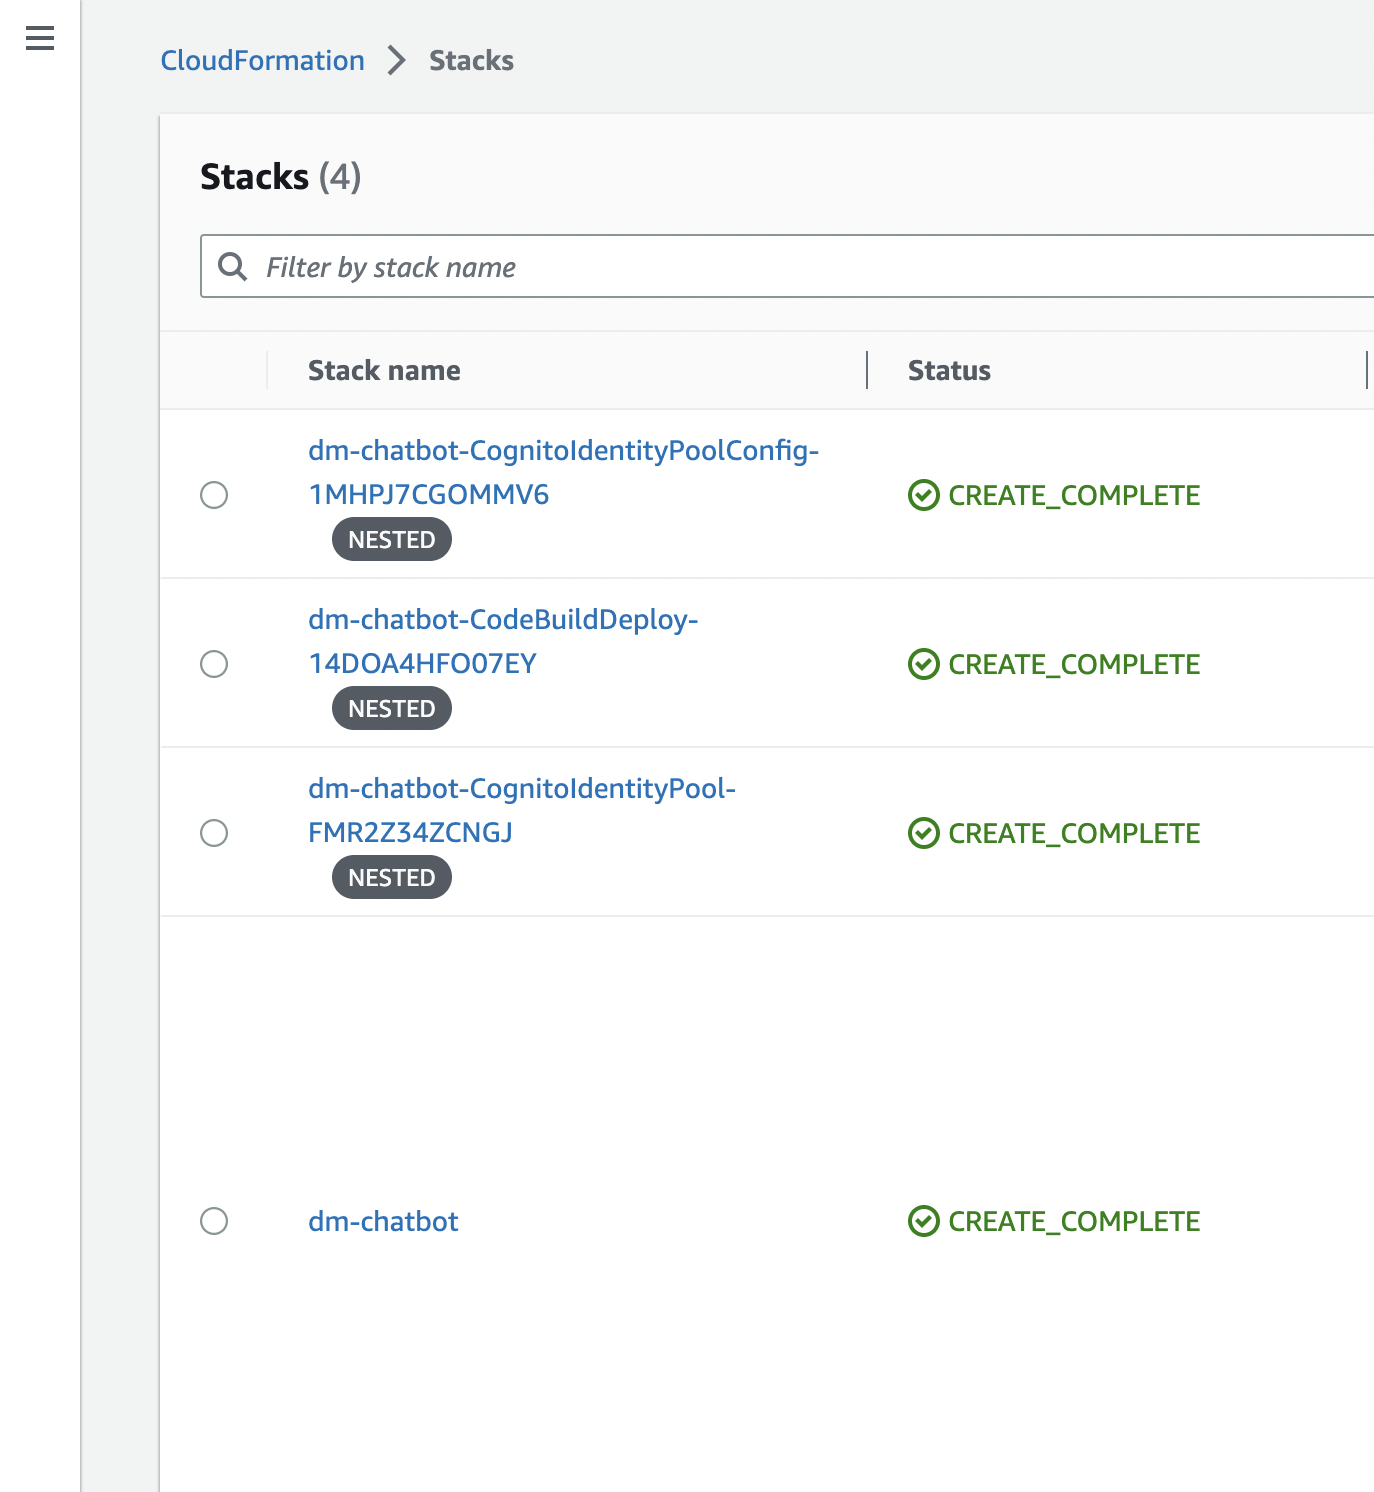
Integrating With React.Js Project
Our stacks have been built and launched, and the status is now "CREATE COMPLETE." Our chatbot can now be integrated into a ReactJS project.
To begin, select the "stack name" that contains your chatbot in the CloudFormation console.
Scroll down the page and look for "SnippetUrl." Click on the "Outputs" tab. Clicking on the URL should take you to a page with a code snippet that you can paste into your web application.
Because we're integrating it with a React JS application, copy the snippet code and open your project's index.html file in the public folder.
Paste the snippet code just before the closing tag of the HTML file's body element. When you visit your page, your chatbot should be visible on the bottom right side of the screen.
Amazing! You now have a Covid Tracker Lex-powered chatbot that is fully operational. Test the chatbot now, and you'll see how quick and effective it is.
Conclusion
Building chatbots with AWS Lex, Lambda, and CloudFormation and integrating them with a ReactJS web app is a powerful and efficient way to increase user engagement and customer satisfaction.
You can easily create chatbots with natural language understanding, integrate them with your web apps, and automate various workflows using these AWS Services. You can quickly build and deploy chatbots by following the steps outlined in this article without worrying about the underlying infrastructure.
You can provide an end-to-end solution for building sophisticated chatbots that can improve user experience and streamline business operations by leveraging the power of AWS Lex, Lambda, CloudFormation, and Reactjs.


